


This is is a new and improved strategy to win - or at least not lose as heavily at - the first mission of the Three Steps Campaign. It seems silly to write a walkthrough about one's own campaign rather than the official game campaigns, but I learned a number of things while playing and replaying this campaign that apply to winning campaigns generally, so it's not a total waste of time.
To recap from the campaign's readme file: there are three missions. The first is to mine a planet dry in four weeks, the second is to make a huge, bare planet into a tourist resort and the third is to survive on a piddly little planet full of lava. Only the first mission has a deadline, and the planet it takes place on is so rich in resources that not only is it impossible to mine them all in four weeks, but they actually get in the way of mining. A number of things are important: mining the iron and iridium first; getting as many warehouses laid out as possible; converting all mined and harvested goods to iridium with the target of taking up to 280 units of iridium to the next mission; and efficient timing, especially during the first four days. In fact, if in the first four days it turns out that one character has been sneakily slacking off rather than building androids or mining titanium, it may be better to restart the mission.
Why iridium? Because from one mission to the other, you keep only a tenth of the money you have, but all of what you've mined, or at least as much as will fit on the warehouses present at the start of the next mission. It appears to be possible to alter this in the campaign editor, but that's the default setting. And iridium is sold at 1000 (also a default which can be altered in the campaigne editor) per unit, which means one warehouse of ten units is worth 10000, which is more than even titanium. Iridium is best for cramming the most value into little space.
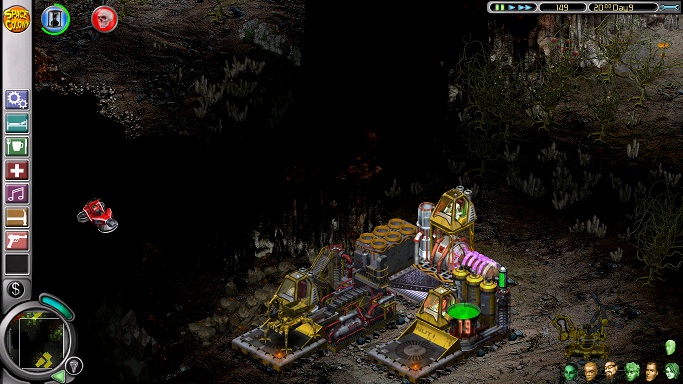
At the beginning, warehouse expansion is blocked by vegetation, iron deposits and a few pesky iridium crystals. More vegetation prevents putting down scavenger bunkers and a bigger base, as well as silicon miners to get rid of a huge seam of silicon. And there are weeds. These must be eliminated first, as they include podulus plants.
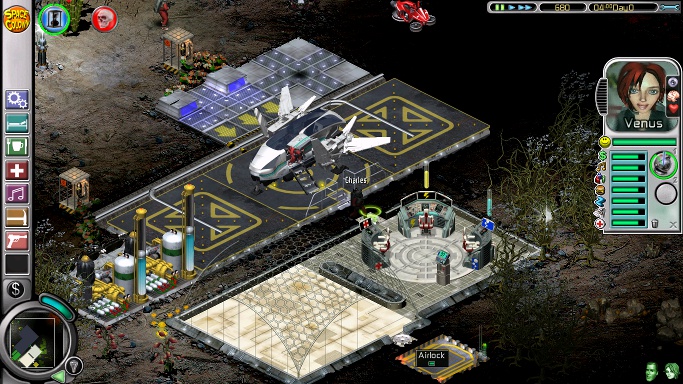
At the start of the mission, as soon as Venus' face appears, click near the topmost one of two podulus clumps dimly visible to the left of the base. Rather than enter the bridge, she will now "patrol" at the spot clicked on, meaning, she'll stay there until it's weeding time. On Day 0 Hour 4, the first bit of money comes in, and Charles descends from the landing pad. Pause the game when his face appears, but before he enters the bridge. Buy two weeding posts; put one near each clump of podulus and assign Venus to the top weeding post (she should already be standing right next to it) and Charles to the other one. Buy two lights: put one near the topmost clump, because otherwise Venus will miss parts of it. Lupulus humulus is slightly luminescent, allowing weeders to find it without extra help, but any other weed needs to be lit up, or it will be ignored.
Click on the images to see bigger screenshots.
Let Barbara enter the bridge and put her on the power desk for now. Watch Charles and Venus; as soon as they've finished their podulus, around Hour 8, they will walk towards the lupulus in the top left corner. Select Charles and instead send him to the lupulus to the east of the base, above the lake. Click on a clump that is not too near the volcanic vent in the belt of lava (or Charles will land in lava after getting off the space bike) but close enough to the volcanic vent that he'll weed near the lava first and then move down to the lake (so he won't walk through lava when the space bike comes to pick him up). If any colonists walk through lava or get stung by bees, their bad health decreases their shift time.
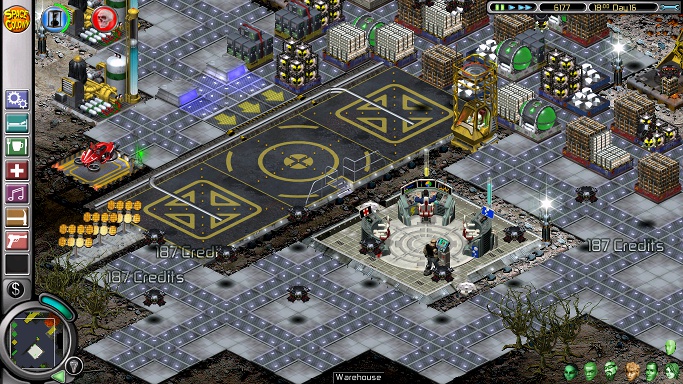
On Day 0 Hour 12, have Barbara fulfill her most urgent need - money - at the cash machine, because on Hour 16, enough money will roll in to buy a scavenger bunker. (I tried to speed up this moment by decreasing their wages, but that simply causes them to quit working sooner and hang around wasting time, while not making much difference financially.) On Hour 16, pause the game and find a suitable spot for the scavenger bunker - either near the crystals above the lake or, if that place is too choked with hydromorphus, next to the crystals in the south east valley, leaving enough room for an iron miner and a nutrient harvester - then assign Barbara to it.
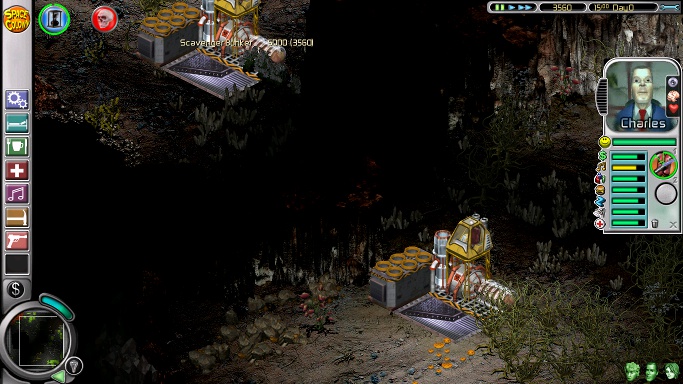
Two screenshots combined to show either option.
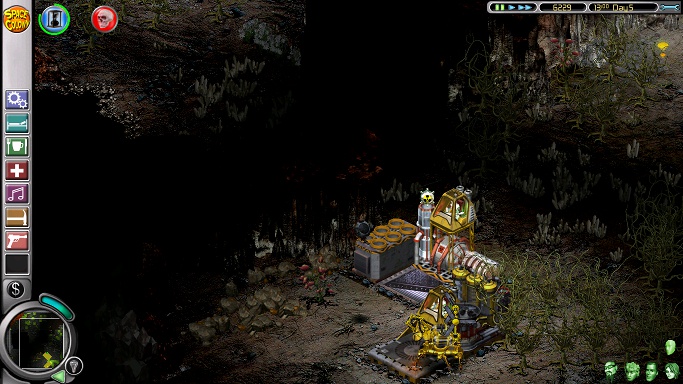
Let Barbara do her bit and watch the weeders. When the space bike lifts off, it's clear that Charles has finished his patch. If Charles and Venus weed together, they will simply follow each other blasting the same weedy spot, which is why they were separated; so when Charles is done, sell his weeding post and let him mine titanium (an expensive ore, which will pay for the android-making supplies) while Venus finishes alone. There should be enough money now for a titanium miner and a nutrient harvester; on Day 1 some supplies will have been dropped off, which can be sold. The titanium miner goes right up against the titanium crystals and as far to the left as possible, leaving some space between its back and the stony patch so that the mining bot can walk all the way around the miner without being forced to go through lava. The nutrient harvester, so as not to be in the way of future warehouses, goes against the big silicon crystal above the lake. Venus goes there to clear space when she's done weeding, which is when the flamethrower reappears in her weeding post, and on Day 1, between Hour 6 and Hour 10. The second weeding post can also be sold; they should both fetch more than 100 credits.
A miner, a harvester and the first two warehouses.
As Day 1 progresses, lay out more warehouses in the space Venus clears, so the hydromorphus doesn't grow back. When money permits, buy a chicken restaurant and ten units of chicken, because this will fill up both food and fun needs, and Charles soon mutinies if he doesn't get his fun. Around Day 2, Hour 0, the colonists's shifts will be ending. Have Charles and Venus eat chicken or just socialize, and send them back. Barbara will be heading for the cash machine. She is on bad terms with both other colonists, so don't let her talk to either of them.
On Day 3 there should be enough money to buy a training pod (a library is too slow) and train Barbara two levels in android production. DO NOT start training when her shift is about to end, or the end of the shift will abort the training, and the money that paid for the training will be wasted. As more money becomes available, buy a cybernetics lab and five units of electronics. Barbara will now make androids and nothing else, so delete her other jobs so she's not off doing something else while a fully stocked lab is waiting. Make sure to always have at least five units of electronics in stock while each android is being made, for faster restocking, and see to her needs while the lab is being restocked. While she's building the first android, enough money should come in from selling resources to train her yet another level, so that she has two stars in cybernetics and any android she makes, has one star in every skill. The first android should be finished at the end of Day 3, and can take Barbara's place in the scavenger bunker. Let Barbs have some chicken while the lab restocks, she deserves it.
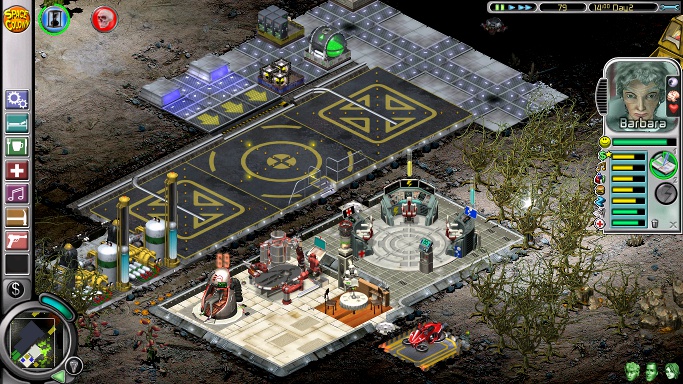
Barbara trains while the lab is ready to be stocked.
Early on Day 4, Barbara should have made another android, and been trained to 3 stars. The android can help eradicate the hydromorphus with a nutrient harvester placed in the top left corner. The space towards the top left corner can be filled in with warehouses, leaving a space for the second titanium miner that will go behind the first in a few days' time. (Warehouses, once put down, can't be deleted without losing whatever was either stored on them or being carried by their droids, which can cause extra problem if the droid was about to deliver, say, the last electronics unit to the cybernetics lab. The lab may then never be fully stocked, thereby wasting four electronics units (and the fifth that was carried), a unit of iridium and the lab itself, which is now useless; a critical waste of resources when money is short.)

The warehouses now extend in both directions.
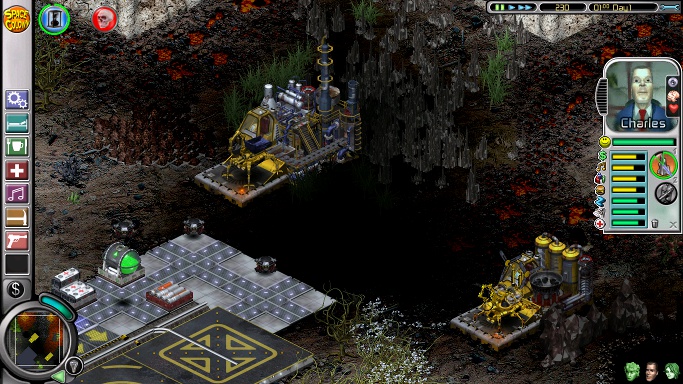
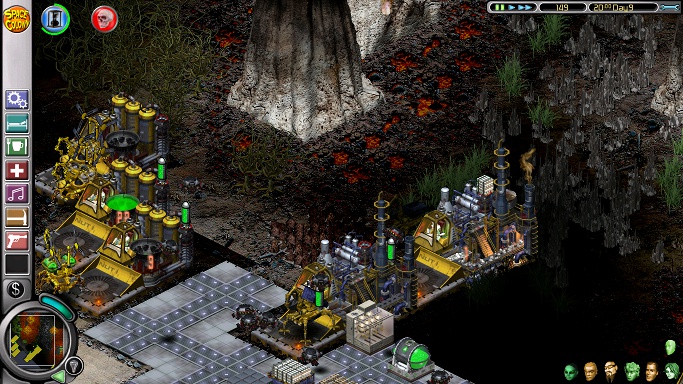
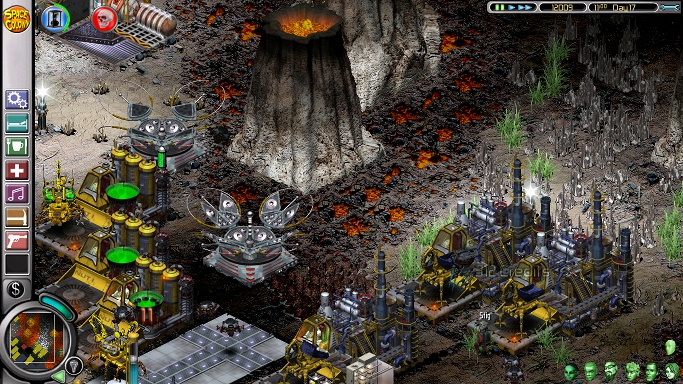
Shortly after, Stig should arrive. Get Charles back in the bridge to work on power and oxygen while Stig, with his three stars in mining, takes titanium mining to the next level. A message will say that more power generators are necessary. This is the moment to put a lava plant over a vent near the volcano. It will be battered by falling rocks, but that's a good thing for when the second titanium miner is added.

The first lava plant.
Day 5 sees the third android, finished either just before or just after enough money rolls in to train Barbara to four stars in cybernetics, meaning that any android she puts the finishing touches on will have two stars in all its skills. The android will help in the hydromorphus clearing effort in a third harvester placed in the southeast valley, in the dim light of photocyns, leaving enough space for an iron miner next to the iron ore.
The third nutrient harvester, bottom left.
Barbara's social needs bar (and maybe hygiene bar, too) is now in the red, but she'll have to hold on a little longer; make sure she doesn't initiate a conversation with the other colonists. Especially with Stig, who will come in at the beginning of Day 6 for a bite just as another android is finished. In keeping with the policy of having the machines manned as continuously as possible, the android can mine titanium while Stig eats and collects his wages, and maybe even chats with Charles. Stig probably won't be returning to titanium mining for a while, because if there is space - if the hydromorphus around the base's airlock is sufficiently cleared, or isn't obstructing the placing of an iron miner there - he will be trying to get rid of the iron that's blocking warehouse expansion. First, when no one is using it, delete the space bike post and put in a new one behind the warehouses to the left, out of harm's way. Then delete the airlock, and put a new one in the side of the bridge. Finally, put the iron miner by the side of the base. It should be a very snug fit.
Note also the engineering repair facility and the barely visible second titanium miner placed for the last two colonists about to arrive.
Replacing the space bike post with an iron miner.
To androids which have between 100 and 50 seconds left, falls the job of eliminating pyrocyns. There is a good reason for not lighting up the northeast valley at the start of the game, apart from lack of money: it contains a patch of these explosive hot toadstools that any colonist on weeding duty, if they are visible, will try to "weed", generally resulting in the colonist's death. The dying android doesn't need a weeding post; it's enough to put down a light or two to make the area accessible, select the android and click on the pyrocyns. The android will travel to the spot clicked on, probably by space bike, land on the pyrocyns and be destroyed, taking some pyrocyns with it. Given the size of the pyrocyn patch, it may take two or more androids to clear it, or just one android if the android is lucky and doesn't get hurt on the first landing. These nasty toadstools need to go, because this is where a second base will be built, so that the first can be replaced by warehouses. Depending how soon the androids were built, this job can start around Day 6 and be finished two or three days later.
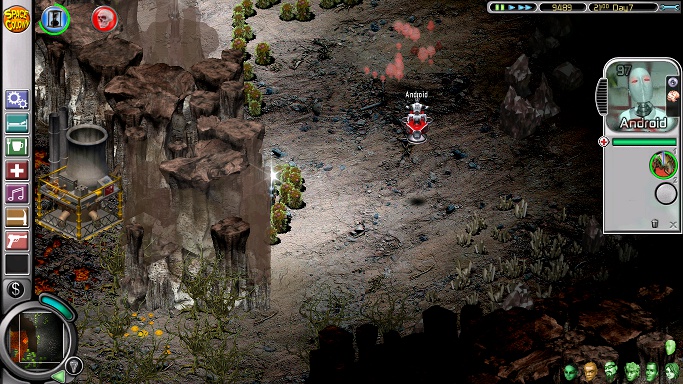
An old cyborg sacrifices itself to clear out the pyrocyns.
In the early morning of Day 6, Nailer, the only colonist that can stand Barbara, comes in. Let poor Babs drop everything she's doing to have a chat with him. Then add a second titanium miner for Ashia, behind the first one, and an engineering repair facility for Nailer, because Ashia's miner bot will tend to walk through lava. If only the bot is damaged, the engineering repair facility won't see anything to fix, but because the lava plant is rather battered by now, Nailer will repair that first and then the bot, as an afterthought. So, to keep the titanium mining going smoothly, there always needs to be some damage to stationary structures. If however the titanium bot is destroyed, don't bother making a new one, as time is very short; just delete and replace the miner.
Ashia has one star in harvesting and none in mining, so on Day 7, as soon as a new android is finished, put a new harvester in the space cleared by the second one in the top left corner so she can give the mining job to the android and start clearing vegetation around the volcano, because there is some iridium hidden under the greenery. As more space is cleared above that nutrient harvester, add another to spread the harvest so that the area will be cleared quicker and there won't be one single harvester containing 30+ units of green gloop that the operator can't pump out fast enough.
Two titanium miners and three nutrient harvesters.
Barbara should be spitting out androids at this point, so there will soon be new ones to man the empty machines or replace old ones that have gone pyrocyn-clearing, or just died. There will certainly be a new one for the engineering repair facility, so that layabout Nailer can go to a spot where his flaky work mentality won't cause trouble for others: a new iron miner on the other side of the big silicon seam, where enough vegetation has been cleared to fit a second scavenger bunker.
The base will be getting dirty, but that doesn't matter as it won't be around much longer. Venus should be dropping with sleep and needs a bed; that same bed can serve all colonists for the rest of the mission.
Mining iron on the other side of the seam.
From Day 8 into Day 9, while the pyrocyns are being exploded, enough money has come in for Stig to train a fourth star in mining and for Ashia to use the remaining trainings to maximize her harvesting skill. Since neither of these colonists have their special fun objects yet - the disco doesn't do much for them - an added advantage to sending Ashia in for training is that, despite her protests at "going back to school", the training pod raises her rapidly dropping fun need. After that, the training pod can be sold for a pittance.
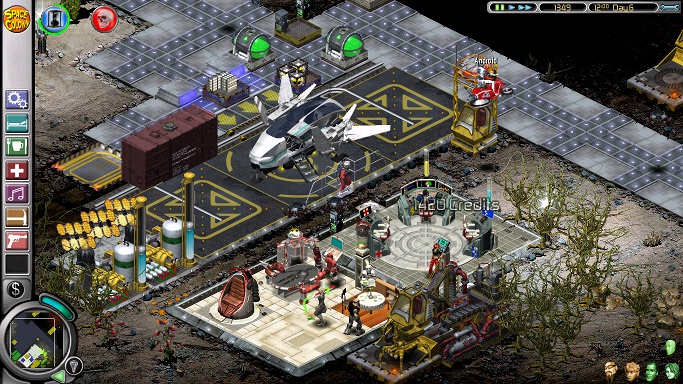
Far into Day 9, the time has finally come for that new base. Fit two medium bio domes against the rocky western wall of the northeast valley; add corridors, airlocks and space bike posts; move the bed and chicken restaurant there, and the cybernetics lab just after an android is finished and before restocking starts; add a second lab; then put in the following essentials: a bar (for Stig, Nailer, and Charles), a running machine (for Ashia), a shower and a cleaning post, to be manned by Nailer before doing some other unimportant work. The old base has to be deleted so he won't take his broomstick-on-wheels there every time he does his cleaning rounds, although the bits of corridor extending from the bridge may be hard to get at while the iron miner is still there; but they can be gotten rid of later. Optionally, a mess hall can be added, or extra beds for sleep-loving types like Nailer. What should not be added is a social area (the colonists have no time to work on friendship, and the mission ends too soon for friendships to deteriorate significantly) or a repair unit (nothing gets the time to wear out).
Outside the new base, there should be space for a silicon miner and another scavenger bunker. The idea is to hold off mining silicon, which tends to distract warehouse droids from other tasks due to its high production rate, until the hydromorphus, iron and iridium are exhausted. But Nailer will mine at such a slow pace that his silicon output won't be a problem.
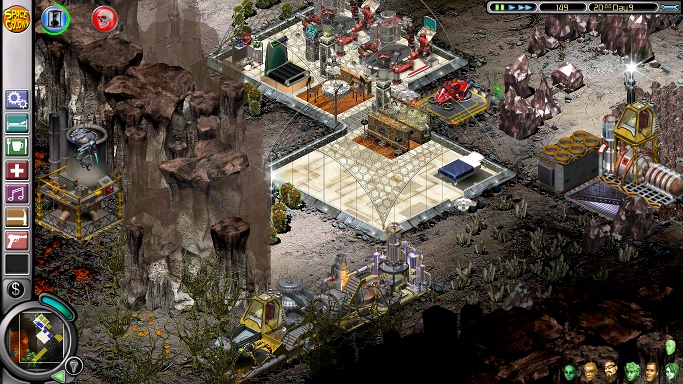
The new living quarters, and the first silicon miner.
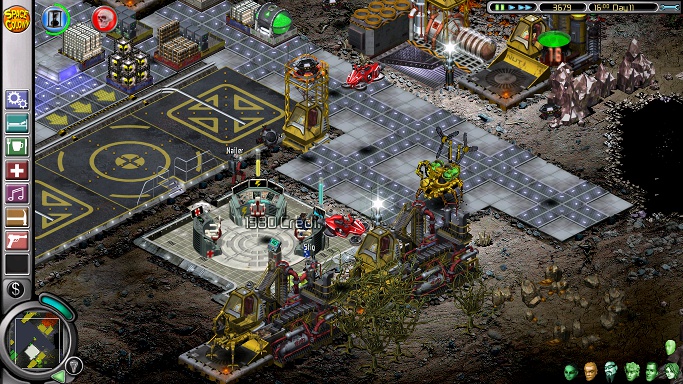
With so much harvesting going on, adding new warehouses becomes of vital importance. With too few warehouses, mined or harvested resources will build up inside the machines and/or stop them from functioning; iridium will sit on top of the scavenger bunkers endlessly, passed over in favour of metals and silicon; the cybernetics labs will not be restocked; or transportation jobs can "fall out of the loop", where a machine's goods are just never collected, or the partial stocking of a cybernetics lab is never finished. In these cases, the only, very wasteful, option is to delete the machine. Money should be getting less tight by now, allowing for advance stocking of electronics units, putting lights here and there and, on Day 10 or 11, putting a scavenger bunker near the titanium miners for the purpose of mining exactly four iridium crystals; three just below the scavenger bunker, that need a light near them to be detected, and a fourth among the iron deposits lower down. Once these four have been mined, delete the scavenger bunker, as its bot will travel a long way for further crystals, probably burning itself up in lava (while carrying an iridium crystal if you're really lucky) in the process.
Those pesky few iridium crystals.
With a higher disposable income, it is now also time to add a space defence shield near the three nutrient havesters in the top left corner, which are being damaged faster than they get repaired as they venture further north under the showers of rock belched out by the volcanoes; another lava plant to keep up with the energy demands; extra scavenger bunkers to clear out the iridium faster; more space bike posts to transport the many androids moved from post to post to keep machines manned while colonists eat and sleep; and a second iron miner above the first one, in an area now hopefully free of hydromorphus, to hurry up the process.
Iron mining assistance for faster warehouse expansion.
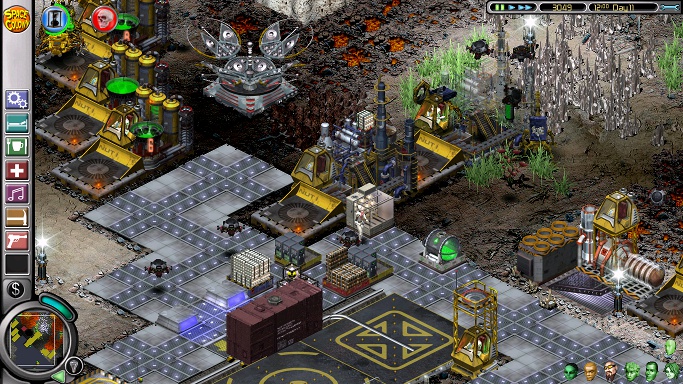
These two iron miners should be scraping away until Day 16, when all iron on their side of the silicon seam is gone, and they try to cross it to get at the ore on the other side. Send their operatives elsewhere as soon as their own iron content has been processed and popped out for the warehouse droids to collect, and delete them when they're empty (or sooner if the droids won't pick up the iron). Also delete the two oxygen plants and put new ones in some free spot, and any protruding bits of corridor. Now fill up the area below and around the bridge with warehouses. (At this point, there may be some pesky spots of vegetation remaining where the bottom left warehouse should be, so use the harvest marker - the green crosshair - to make Venus chop that up and then set it back to the area where she was harvesting before.)
Warehouse expansion almost complete.
On Day 17, enough titanium will have been mined to delete the topmost titanium miner and add two new ones further up. They have to be placed carefully to allow enough walking room both around and between them, to minimize the bots' bad habit of walking through lava. A second engineering repair facility is a good idea and also an ideal place to station new androids sent to replace old titanium mining androids who are almost at the end of their lives; having the new android hop to the miner from the engineering repair facility is faster than sending them there directly from the cybernetics lab. To make sure there is less to repair, put a space defence shield on the "island" surrounded by lava. This will also shield the lava plants, so put a light among the titanium crystals to get battered and keep the repairs going. The light will be destroyed every so often, but replacing it will be easier than replacing the lava plants or titanium miners.
There should now be room in the top left corner for a light and a scavenger bunker to mine those few iridium crystals, after which it can be deleted.
Three titanium miners, and some protection.
Around Day 20, the hydromorphus should be depleted. There are five nutrient harvesters, so this will take some coordination, for the silly reason that if any machine is unmanned when its associated resource becomes depleted, any attempt to assign someone to it later results in "this machine has no resources on visual", and it's not even possible to pump out the green glop it still contains. As with machines that have "fallen out of the loop", the only option then is to delete them, complete with the now unreachable resources they contain. So on Day 19, or as soon as there are about six plants left, all androids Barbara makes should go to nutrient harvesters while Venus and Ashia take some time off to recover. Also, if the plants on the left side (top and bottom) are gone but there's plenty of plants to the right, or vice versa, the harvesters on the "empty" side should be left unmanned, or their bots will cross through lava to get to the plants on the other machines' turf, and a harvester without bot also becomes unoperable. All harvesters should be manned the moment the depletion of hydromorphus is announced, until their bots have returned to the harvesters and been parked there; then, androids can be sent elsewhere and Venus and Ashia can empty them out, which could take up to Day 27. Then all empty harvesters are deleted, making space for two extra warehouses.
Iron will also become depleted around Day 20, but with only one iron miner left, there shouldn't be any problems.
Around Day 22, the iridium will become almost depleted, because six iridium crystals are inside rocks, and while these can't be mined, causing the scavenger bots to retreat back into the scavenger bunkers, the scavenger bunkers will remain manned. Use the planetary scan to check the amount of iridium; once this is close to 6, delete all scavenger bunkers from which warehouse droids have just removed a unit of iridium (ie. they're empty and their bots haven't picked up any crystals yet) and make sure the remaining ones are manned with androids that won't expire soon. Once the amount is down to 6 and there are no scavenger bots visible, delete the rest, so the androids there can do something more useful than sit hopefully on a non-functioning scavenger bunker. If any bunker is deserted at the moment the iridium count goes down to 6 (ie. the iridium is functionally depleted), any crystal in it, about to pop out of it or even resting on top of it while its tubes are still purple, may be considered lost.
With nothing left to mine but titanium and silicon, and the space to put lots of silicon miners, it's time to do just that. Barbara can stop making androids somewhere during Day 26 - delete each lab as soon as it has delivered a new android, to prevent it being restocked - and work on power or oxygen with Charles or, if she's really strung out, laze around for the last two days getting her needs up before all the buildings (restaurant, shower etc.) are sold. The colonists and remaining androids can devote themselves to mining, oh, about one-tenth of the silicon present before the mission ends.

Last few days: silicon mining only.
At the end of the mission: on Day 28 Hour 8, sell all remaining mining machines (the harvesters should be gone by now), letting the warehouse droids take the last silicon to the warehouses. Also, sell off all structures that aren't warehouses, and convert the money to iridium. When the screen "mission success" comes up, pause the game and sell off any remaining resources that are not iridium and buy more iridium. The idea is to take 280 units of iridium into the next mission, because that's as much as the next base's seven warehouses will hold. Selling the mined resources for money, as advised in the mission briefing, is a bad idea as Blackwater will grab 90% of the proceeds. If there are less than 280 units of iridium (I usually wind up with about 200) it's a good idea to also take some food to the next mission, so the colonists can weed first and start cultivation later.
After playing this mission obsessively, I've found it is possible to mine the planet dry using the Shift/Alt/O money cheat, so that Barbara can be trained to maximum android-making skill in the first two days and turn out an unlimited amount of androids. It's still not easy, though.
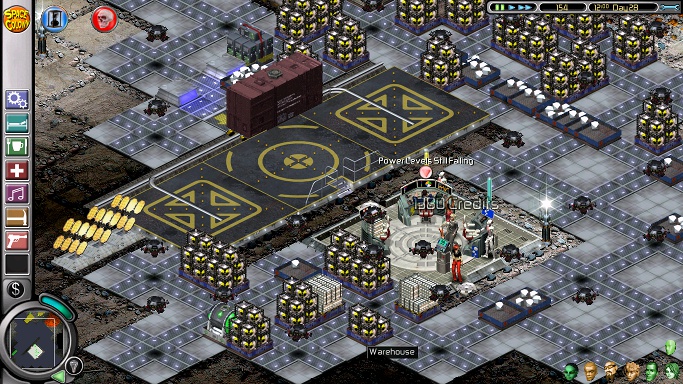
Just before the end: nothing but warehouses and iridium.
The next mission doesn't really need instructions, beyond what's in the original spoiler file, but here are some anyway:
The second mission starts on an almost completely dark planet with the first three colonists: Ashia, Nailer and the next-to-useless Greg. There should be enough money for essentials like beds, a shower and somewhere to eat, while providing Greg with a jacuzzi and social area are a prerequisite to making him do any work at all. He can man oxygen until his place is taken by the equally useless Babette, who will arrive later with the other six. However, the most important matter to attend to is the destructive nasties on the right side of the screen, and it's worth it to pause the game, sell a lot of iridium and buy three to six commando posts to plant in some safe spot before sending the commandos running into the darkness. After that, delete the tourist port, put down some space bike posts and extend the base as needed before the stupid rodents get in the way of building by hopping all over the place. Next, put a weeding post next to a photocyn-illuminated podulus plant for Nailer, light up the area around the base (but don't light up any patches of pyrocyns or Nailer will kill himself trying to "weed" them) and place a harvester near the base for Ashia. Optionally, build a tourist complex without any airlocks, so the tourists can't bother the colonists.
The colonists will now have to fend for themselves while the commandos take on the hyracsus and gorilloid, aided by a trail of lights that will be destroyed almost as soon as they are put down. To keep the nasties occupied, plant a small bio dome before them, which will distract them from following the trail of lights leading to the bridge; to stop them moving towards the bridge altogether, delete a few lights in the trail to create a band of darkness and put more behind the nasties to make them turn back. The commandos need light to aim but, once locked on, will continue firing in darkness, while a hyracsus with no light to attract it will stay in one spot. Annoyingly, though, the commandos will pass up the big monsters to shoot at slugs, which is why the player has to keep a constant eye on them. Things like hovermines and cluster bombs won't work, as they are destroyed from a distance. Once the destructive monsters are gone, the whole planet surface can be lit up (there are two volcanic vents to put lava plants on) and, after a bit of colonist training, androids can be used to weed the metaflaxus spreading from the top right corner (don't put the weeding posts where the burnflies are, they will destroy them). The harmless slugs can be eradicated by the commandos (tiresome, as they constantly have to be directed to where the slugs are) or by automatic lasers dropped down all over the landscape (Greg can mine argon gas to prime them for free) and sold as soon as the last slug is gone. After that, the mission is purely a matter of landscaping and watching the ant farm; if you want to green the whole surface, put down a number of bio labs (have androids man them) and don't start building a golf course until everything is covered in grass. Be sure to store 40 units of iridium for the third mission, which has only one warehouse.
The third mission is adequately covered in the original spoiler file, with
the addition that the iridium can be used to power the space defence shields
while a supply or argon is being built up to prime the lasers that will protect
the future lava plants.
